8
Chapter 8
Optimizing Data Fetching
In the previous chapter, you fetched data for the Dashboard page. However the data requests are creating an unintentional waterfall.
In this chapter...
Here are the topics we will cover:
How to reduce data fetching time by passing requests in parallel
How to trigger data requests only when necessary
Simulate a slow data fetch to see what happens.
Parallel Data Fetching
With routeLoader$ the page is render blocking until all the data is fetched. It is important to reduce the data fetching time. To do this, we can fetch data in parallel.
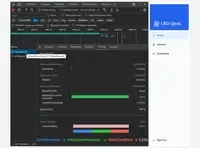
For the moment with sequential data fetching, in your application, the useFetchData() request time is 1.23s. We can reduce this time by fetching data in parallel. 👇
Note: The request time may vary depending on your internet connection and your computer's speed.

Now let's move on to setting up parallel data loading.
To pass the requests in parallel, we have several choices:
Promise.all()- Combine multiple promises into a single promise.Promise.allSettled()- Wait for all promises to be settled.- Using multiple
routeLoader$- One for each request.🤔
Multiple routeLoader$
Multiple routeLoader$ are allowed across the whole application, and they can be used in any Qwik Component. You can even declare multiple routeLoader$ in the same file.
Let's create three new routeLoader$ functions to fetch the data in parallel:
We have created three new routeLoader$ functions to fetch the data in parallel. Now let's update the src/routes/dashboard/index.tsx file to use these new routeLoaders.
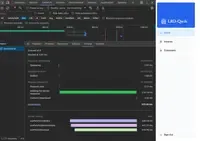
Now, with the new routeLoader$ functions, the data is fetched in parallel. This reduces the time taken to fetch the data.

The time taken to fetch the data in parallel is now 0.448s (The longest request time). This is a significant improvement over the previous 1.23s. 🚀
An advantage of using routeLoader$for each request, in addition to reducing the data fetching time, is to separate the data based on their usage. This is particularly useful if you need to use only certain data in a specific page or component.
Again, all of this will depend on your application and your needs.
For our dashboard, we need all the data for our page, so we will use only one routeLoader$ for all the data. To do this, we will use Promise.all() to combine the three requests into one.
It’s time to take a quiz!
Test your knowledge and see what you’ve just learned.
What is the advantage of using multiple routeLoader$?
Promise.all()
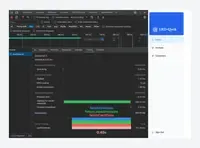
One request is now sent to fetch all the data. The loading time of this request is the same as the previous one, 0.45s.👇

It’s time to take a quiz!
Test your knowledge and see what you’ve just learned.
What is the purpose of using Promise.all() in data fetching?
Triggering Data Requests
We placed our routeLoader$ in the layout, this means the request is sent every time the route is loaded (and even before...). The problem here is that the request will be triggered when navigating to all dashboard tabs.
In the /src/routes/dashboard/layout.tsx file, add a console.log to see when the request is triggered.
Open the browser, when hovering over any dashboard tab, the request is triggered.👇
When our routeLoader$ is in layout, the data request is triggered when hovering over any dashboard tab.
This behavior would be appropriate if we needed this data for all the dashboard tabs.
As a reminder, in our application we only need this data for the dashboard home page. It would be better if the request is triggered only when the user navigates to the dashboard home page.
To trigger the routeLoader$ only when necessary, simply move it to our src/routes/dashboard/index.tsx file.
Now, the request is only triggered when the user navigates to the dashboard home page.👇
When our routeLoader$ is in index, the data request is triggered only when navigating to the dashboard home page.
It’s time to take a quiz!
Test your knowledge and see what you’ve just learned.
What happens when routeLoader$ is placed in the layout?
Congratulations 🙌, you have now optimized the data loading by passing them in parallel and triggering the requests only when necessary.🏆
Simulating Slow Data Fetch
Récuperer les données en parrallele est une bonne premiere étape, mais que se passet il si une requete est plus lente que les autres?
Let's simulate a slow data fetch to see what happens.👇
In the /src/lib/data.ts file, add a delay of 3 seconds to the fetchRevenue() function.
Now open http://localhost:5173/dashboard/ in a new tab and notice how the page takes longer to load. In your terminal, you should also see the following messages:
Here, you've added an artificial 3-second delay to simulate a slow data fetch. The result is that now your whole page is blocked while the data is being fetched.
Which brings us to a common challenge developers have to solve:
With dynamic rendering, your application is only as fast as your slowest data fetch.
The soluce to this problem is Streaming
In the next chapter, you'll learn how to use streaming to optimize user's experience.
It’s time to take a quiz!
Test your knowledge and see what you’ve just learned.
What is the effect of simulating a slow data fetch?
Source code
You can find the source code for chapter 8 on GitHub.
You've Completed Chapter 8
Nice! You've learned about optimizing data fetching in Qwik.
Next Up
9: Streaming
Learn how to improve your user's experience by adding streaming.
https://github.com/DevWeb13/learn-qwik/issues/23